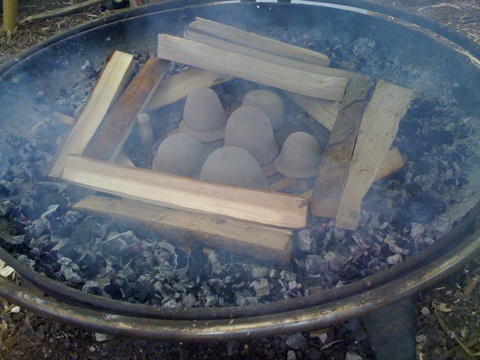
It’s pretty easy in many areas of the UK to find a decent bit of clay to slop in a bucket and take home to process. If you’re very lucky, you can dig and shape the clay straight away.
All you need to do now is dry and fire your pot.
Making Primitive Kilns
This is a simple guide from which to start experimenting.
1. Warm the clay slowly to minimise thermal shock and breakage. Keep turning pots to maintain an even temperature.
2. Split ash logs to necessary size.
3. As clay warms, move pots to centre of fire on top of split ash logs. Begin with bottom layer of split ash for kiln wall.
4. Spread embers around the outside of the kiln and add next level of split ash wall. Keep turning pots.
5. Keep feeding embers with small shavings to maintain heat and add next level of split ash.
6. Place smaller ash sticks as a roof over the pots.
7. Build a pyramid around the kiln walls to create the oven
8. Keep feeding the fire until pots glow bright red
Leave to “cook” for about four hours or so and cool pot slowly. If you’re lucky and the fire gods are on your side it won’t go pop (or later bam). Sounds you do not want to hear when firing primitive pottery.


June 8, 2011 at 7:51 am
wow this is so cool!
We have quite a bit of clay on our property here in Australia… I would love to try this one day!
July 13, 2011 at 5:58 pm
Hi Kate
Good luck and let me know how you get on
Hannah
July 13, 2011 at 3:08 pm
Dear Hannah, this is AMAZING!!! I am not only a writer, but have been a potter and glass fuser. So I love this idea of a homemade kiln. Wonderful, creative….primitive and earthy.
Unfortunately, I live in the southwest, New Mexico, and we can’t have ANY fires at all right now, not even barbecues. We are having some of the worst/largest fires in history here.
HOWEVER, I have added your site to my RSS feed and IF they lift the fire ban, I am going to try this. I LOVE your whole site. It is beautiful, soothing, and RICH with life. So glad I found you. 🙂
I look forward to reading more.
Thank you,
Robin
July 13, 2011 at 6:02 pm
Dear Robin
Such awful news about the fires, I hope you, your family and friends are okay and safe.
Thank you for your lovely comments. Your words really touched me.
Let me know if you ever do get to try it.
All the best Hannah
January 27, 2012 at 12:42 am
This is pretty cool. Can you glaze them in this manner as well?
Thanks
Dave